An iconic part of my Chinese upbringing was watching my parents fold dumplings at the kitchen table. As a kid, seeing my mother transform meat, veggies, and dough into hundreds of delicately wrapped pouches with her hands was magical. I was lucky that I could eat them straight out of the pot whenever I wanted, and it wasn’t until college that I realized fresh Chinese food was something I took for granted.
Whether you grew up with your family’s recipe, or loved eating them at restaurants, you can now have authentic dumplings without leaving your dorm. (And no, you don’t have to use UberEats.) Making your own dumplings is a great way to hone your culinary skills, bond with friends over a group cooking activity, and impress guests—or maybe even a date—with a unique yet traditional dish.
Don’t worry. Although the recipe can look hefty, it is definitely manageable for the average college student, even those who have never made Chinese food before. I made this recipe in English College House’s dorm–wide kitchen freshman year, back when the fanciest thing I could cook was a fried egg.

Homemade Pork and Napa Cabbage Dumplings
Makes 80 dumplings
Ingredients
1 whole napa cabbage
1 lb ground pork
3 green onions
1 ginger
1/3 tbsp salt
1 tbsp vegetable oil or olive oil
2 bags of dumpling wrappers
½-1 tablespoon soy sauce
You can find the pork, ginger, green onions, and seasonings at Fresh Grocer and the newly opened Heirloom Market near Drexel. The dumpling wrappers and napa cabbage might be trickier to find on campus, but you can make an easy stop at a Chinatown grocery like the Heng Fa Food Market and do some exploring on the way.
As for kitchen utensils, you’ll only need a medium pot, a medium/large mixing bowl, cutting board, knife, and chopsticks (if you want to make the most of it).

Directions
Making the filling:
1. If frozen, let pork thaw to room temperature.
2. Peel the cabbage into leaves. Fill a pot with water and let it come to a boil. Place the cabbage in the pot, making sure there’s enough water to cover all the leaves. No need to cover the pot.
3. Wait until the water comes to a boil again to remove the napa cabbage. Don’t wait too long, or else the cabbage could disintegrate.
4. Let the cabbage cool. Cut into small pieces with a knife and squeeze the excess water from the vegetable into the sink. Napa leaves hold a lot of moisture, so the boiling and squeezing are to make sure your dumplings are full of meat and veggies, not just water. Set aside.
5. Put the thawed ground pork into the mixing bowl. Add chopped green onions and part of the chopped ginger (a little more than 1 tbsp) to the bowl.
6. Add oil, salt, and soy sauce and mix until everything is evenly distributed. Add the napa cabbage and mix again until even.
Disclaimer: Chinese moms don’t meticulously measure dashes of salt, so some numbers are approximate. An easy way to see if the proportion of seasonings is correct is to take a small amount of the filling after mixing, cook it for 10 seconds in the microwave, and taste. It should be flavorful but not too salty, since you’ll be dipping it into a sauce at the end.

Wrapping the dumplings:
Here comes the fun part! This is your chance to be creative with the recipe, and it’s the best part to do with friends or a date. You can even make it a competition to see who can make them the prettiest. Even if you get last place, you can eat your own delicious (albeit ugly) dumplings as a consolation prize.
1. Make sure to have a small bowl of water nearby. You’ll need this to make sure your dumplings don’t fall apart when cooking.
2. Grab a dumpling wrapper and put a spoonful or so of the filling in the center of the skin. A common mistake is putting too much filling and having all the goodness fall out when folding, so be conservative.
3. Wet the dumpling wrapper with water around its edges using your finger and then bring the two sides together, making sure to press down tightly.
4. Add symmetrical creases to the top of the dumplings for decoration. There are a lot of ways to crease the skin to make them beautiful, but if you’re a beginner, don’t worry too much about getting them perfect. The most important thing is making sure the dumplings are tightly wrapped. For some simple designs, follow a video tutorial like this or this.
Final steps:
1. Fill the pot 2/3 of the way with water and bring to a boil.
2. Add 10-15 dumplings, making sure not to crowd the pot too much. Place a lid on top.
3. When the water begins to boil again, pour in a half glass of water and recover. Bring to a boil, pour in another half glass, and recover. After a third boil, the dumplings should be ready. A good sign is if the dumplings are floating near the top of the water.
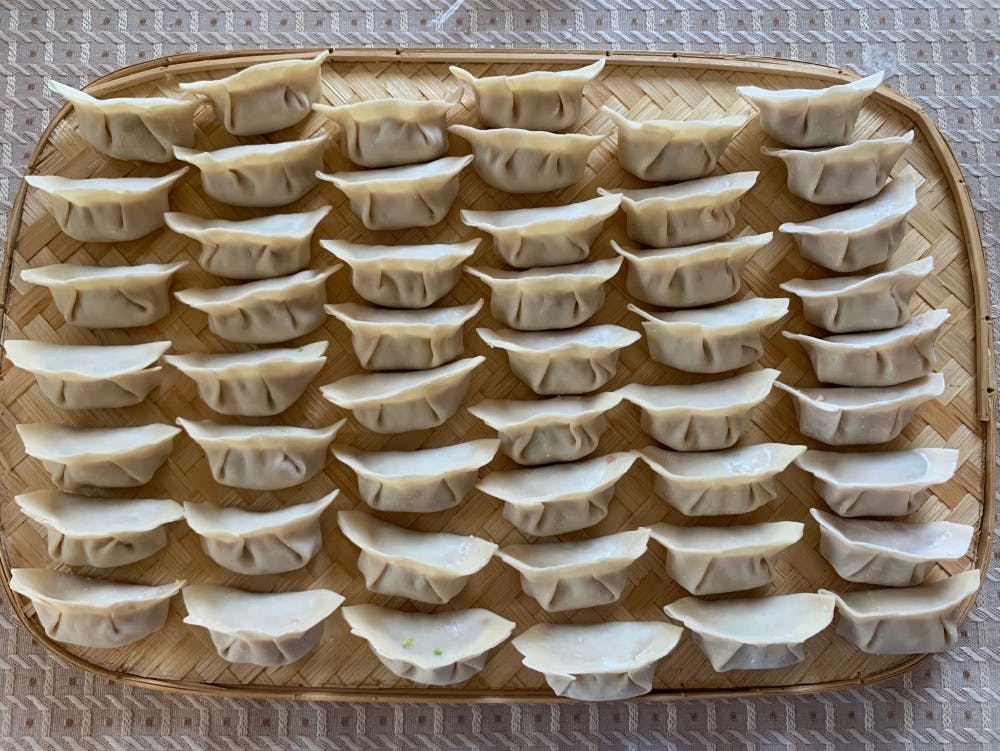
4. Repeat until all of your dumplings have been cooked. They should be soft, steaming, and (hopefully) beautifully wrapped.
Serve your dumplings immediately with the sauce of your choice. My family uses Zhenjiang vinegar mixed with chili oil sauce, both of which are available in Chinatown markets. You can also do soy sauce or go for something a little fancier.
Even though they’re tasty fresh, arguably the best part about dumplings is how well they keep. You can store dozens in a plastic bag in the freezer for months at a time. This recipe can be a bit time-consuming, but now you have several homemade meals you can make in 10 minutes. Prepare an easy after-class dinner or satisfy late-night munchies by boiling the frozen dumplings in a pot, following the same process you did before.
These steamed dumplings are also super easy to turn into pan-fried potstickers. Put 8-10 (frozen) dumplings onto a pan with oil on medium-high heat and let fry until the bottoms are medium brown (not black). Add ¼ cup of water into the pan and let steam with a cover on top for 2-4 minutes, or until all the water is gone. Repeat one or two times. Make sure to stir periodically so the potstickers don’t actually stick to the bottom of the pan. Now you have a crunchy, savory treat to serve either yourself or your guests. I’d pick the first option.